Oasis Student Information Systems > Help Desk > Knowledgebase

Search help:


Article 292: How Do I Authorize Staff to Send Text Messages?

Solution

jY7ElS9f_biPsZQDg_By3NQ6cFWuHMD6N2ju-tXc4WbXUu6Yl7kmg19QAgrdqDagFvNNXIEts6Xut9QsdKCnF53DGNeLcp_tqwdtiQw3BCIIWcbNBoTIFx0f8Eo4hVor969OosaC31e8QC9kWDDWahE


Custom Contact Module
Knowledge Base 2.0 article 292


How Do I Authorize Staff to Send Text Messages?


Navigation Path
<various modules → Text message → Authorized Senders directory 


“SNS” stands for “Simple Notification Service”. SNS is a way for you to reach your users/ students through mass text messages. You will be able to reach them by sending texts from the OASIS system to your user’s mobile devices. You will need to authorize any user/ account, this is done through your senders emails.  This article will walk you through the process. 

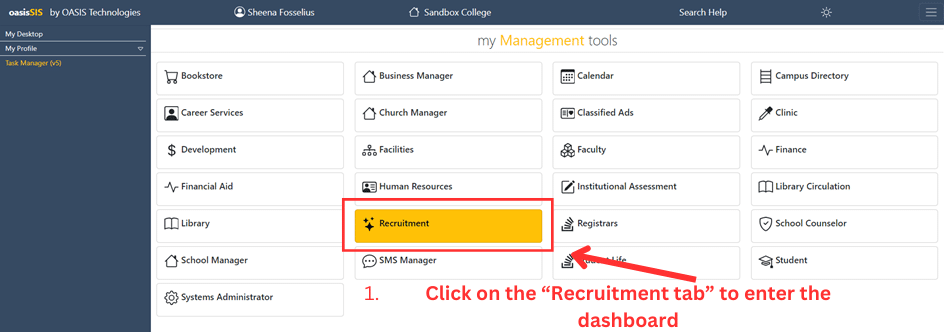
To get to the text message tab click on the “Recruitment” tab.

QX1df6WpXZt9Gf_E9d0QIMN8KLQLmyOXv68xCa107tpjCoOwQSMxbcmu3937mPKvvy339z3ki2-92B7-oVBoppMI-HV5ihTfIyw5u6uejIfi0BlZy3ZPpg5WFL_u9nBdXGh2hwWRusYaqiq-LaXSGPA

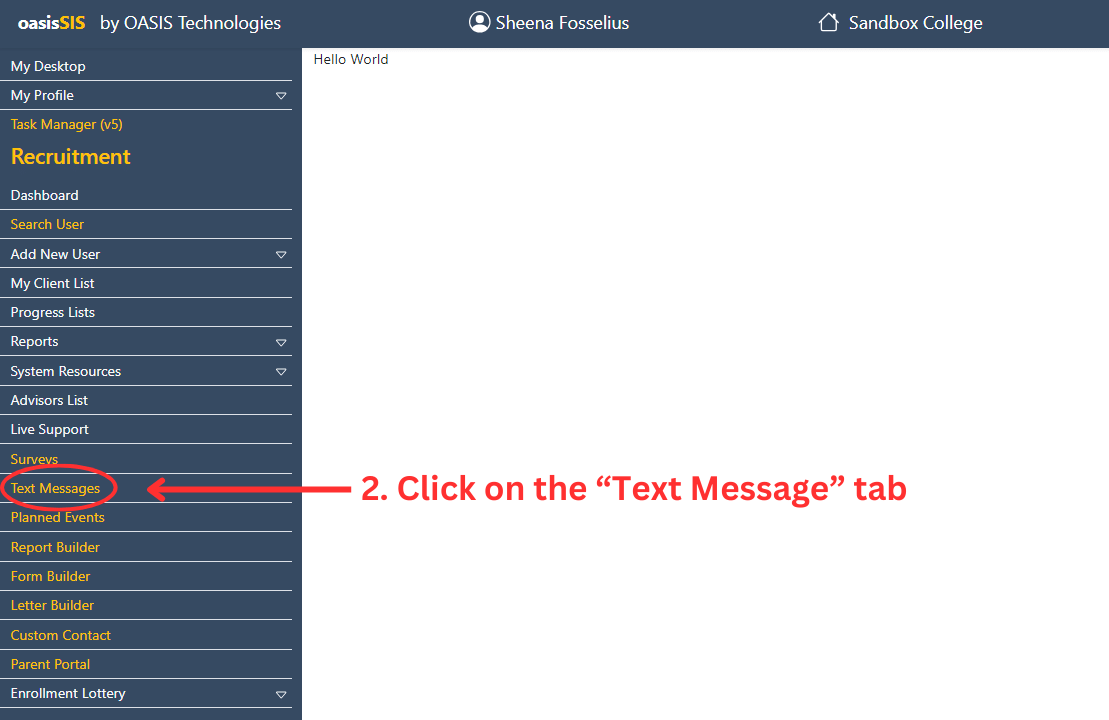
When you get on the main dashboard, click on the “Text Message” tab. (you find this on the left side of your screen). 

3mrtaZR3IRBrfe7sQKDQdByiX0xskI8uS_I2Y1edla3OvfRVrpbbMteE-R7KR39hIA9N94hUCs7J8A9SqkRsXdJutabnYGAuzCQ8l_dt-8zfnMtW4hhujipFdjef4lq1dQMVN4h0DLO9qFbsjxiy-GY

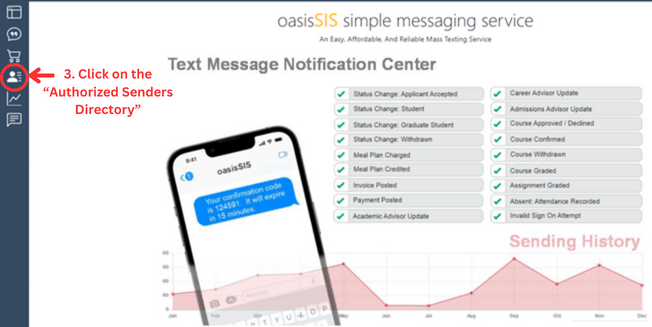
This will open up to your “Text message” main dashboard. You will click on the fourth Icon “Authorized Senders”.

WbTpmX1GYa28lRkXq0oFMcz4xpm-60jSAK10LzOYjVLmeZsEnwBap3U4lmUw7BYaM8byBj-EXXs6htNCCQXwrkrsg4mVeSdttDo0PmpI4iN09uuQ_p9xN2dceDVU60tzClZHLeWWQhKU9U2eEXbEq4o

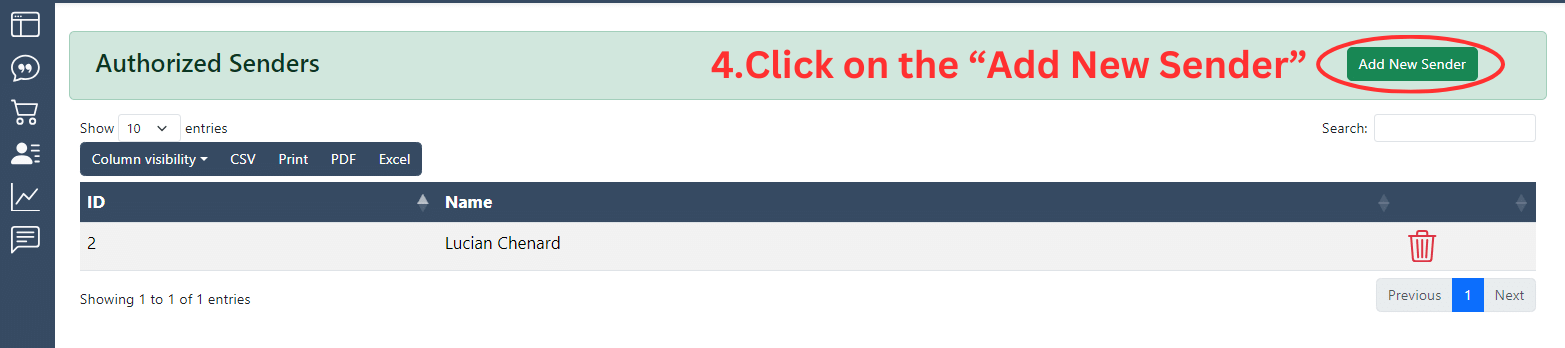
On the next window click on the “Add New Sender” green button. (upper right hand corner of the screen)

WC8Ae4ab263Xi_04EaBd2pzx90d4i3kj-oPQDOzhADw376POgSlGzsPnJgmEN04_zCJn-dFCnGVhjqugYyud1lJQxFuHyCKIH8wb7YJtftNAl-ddiE1a3ZnWCzJKY01mInrgcpozgci054MwAiyX-eA

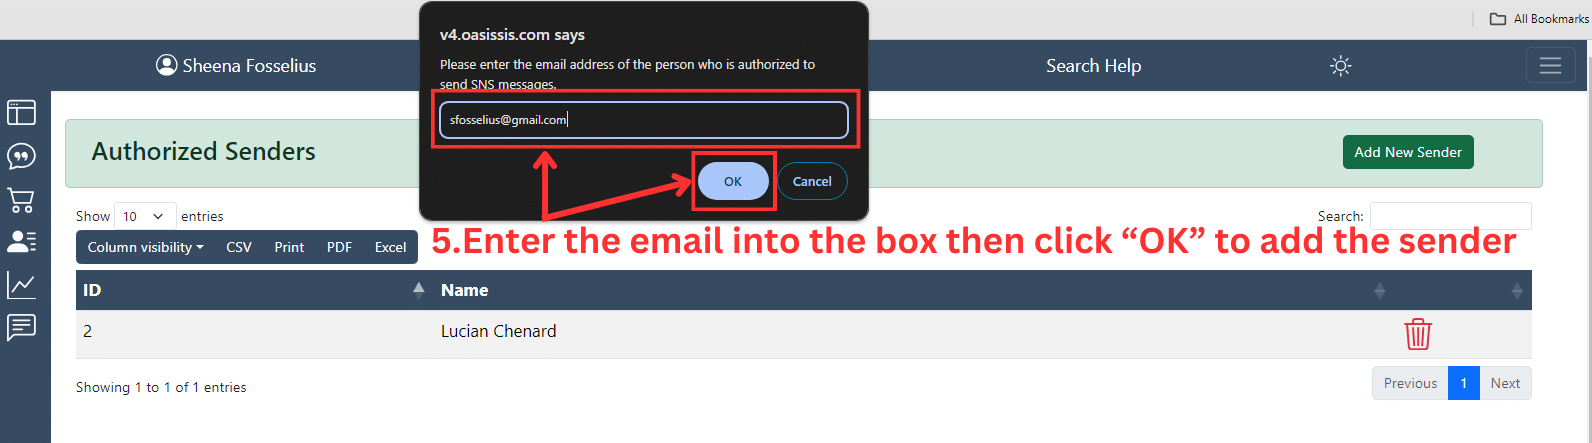
In the “Black box” enter your email of your new sender (this will popup in the center of your screen) and click on the OK button to save the sender.

5pPt3efyUTLlU1R-jZktQxsQzUMbv9asdTcZ3JDEufDu9BzUyVyTIQ5Dde8sOGGKlZyIFCkOYmUDWU-NHtijVr3-L7VG1rPAb1H6QW9cFKlAON7Jx11wM2emFmbxiWN_l6fpwzeRfMD0eAIfdJqZc8Y

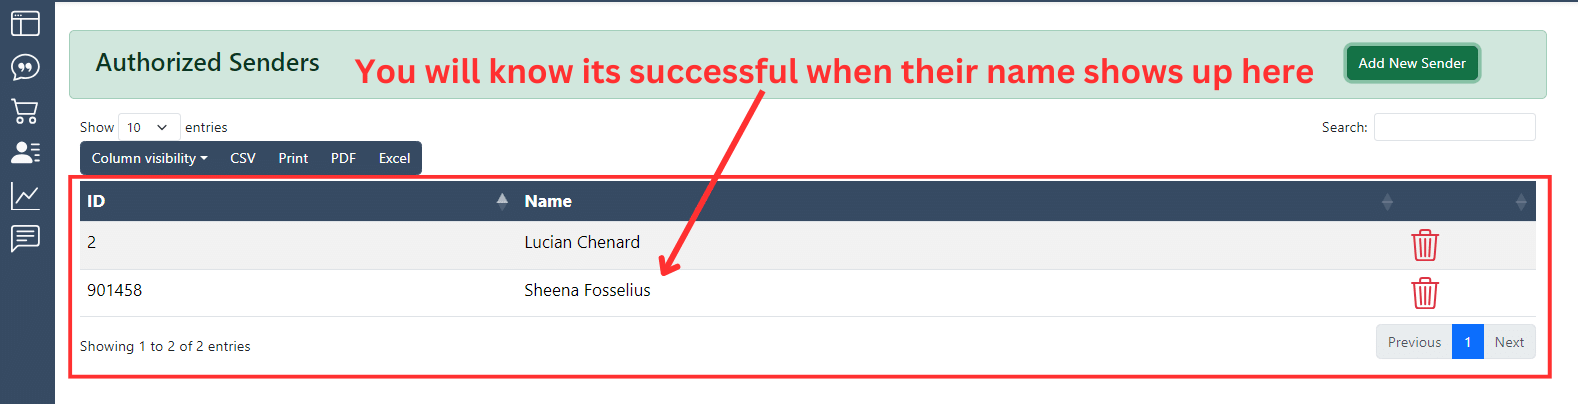
You will know it was successful when you see the new sender’s name show up on the screen. 

-t0Emnhs7g8fLNEgGBwjn_yrlqpFzPaCXjbDPHrbulzlqTYMTXNrkgcBLV0QikO31r1aLhf_7Apjrd56tv0wXk9nVluGncv_lZh4tb1KcOpVhWy_2NKtUWBTXNgf-WYI2zJ_nNCmaEA9ycc8B9m1cOA


Was this article helpful? yes / no
Related articles Article 136: How Do I Create A Custom Form?
Article 569: How Do I Add "Images" To My Survey?
Article 572: How Do I Add A Survey Question ?
Article 294: How DO I Send Group SNS Messages?
Article 561: What are My Options for Sending SNS (Text) Messages?
Article details
Article ID: 292
Category: SNS Simple Notification System
Rating (Votes): Article not rated yet (0)

 
« Go back

 
Powered by Help Desk Software HESK, brought to you by SysAid