|
You will have the ability to create “fields “ for your custom forms. You will find this option in any of the main modules in the drop down menu of the “Module” tab.

( System Administrator/ Recruitment/Admissions/ Human Resources/ Career Services/ Student Life/ Finance/ Development/ Financial Aid )
From the “Module” you will be taken to the dashboard for your module. Click on the “Custom Forms” tab listed on the left side of your screen (Forms Builder (v5) This will take you to a new browser tab.

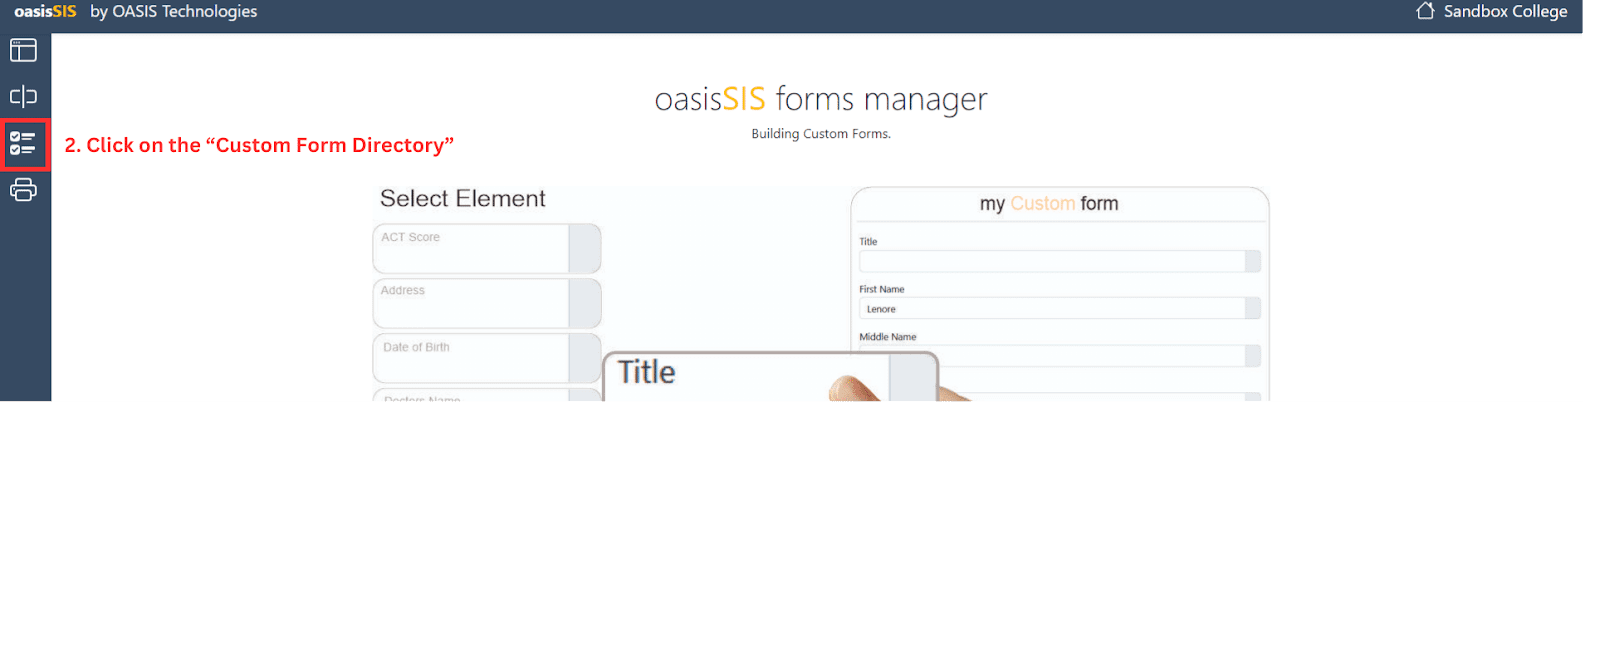
On this page, click on the third icon on the left side of the screen. The “Custom Form Directory” icon (again this will open another page)

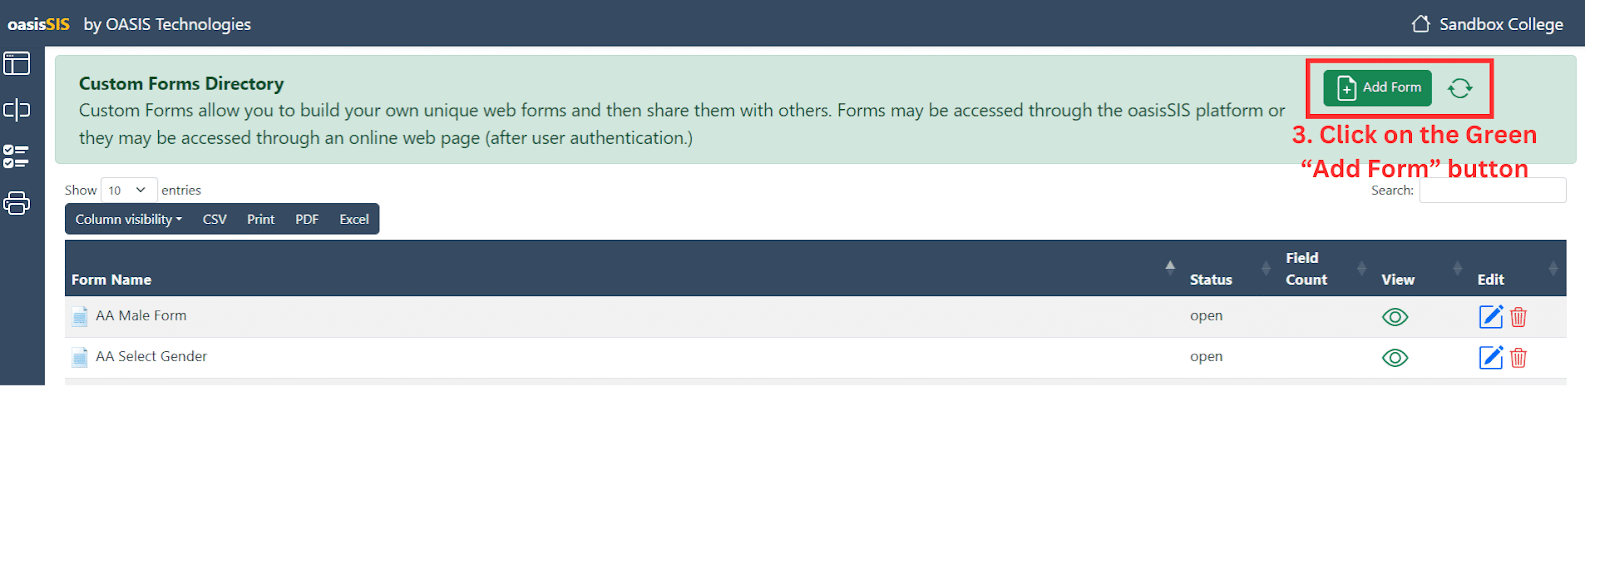
You will land on the “Custom Forms Directory” dashboard. At the top of the page in a green box with an “Add Form” button. Click on the green button to add your form.

In the pop up window name your form you are wanting to create.

After making your form, scroll through to find the one you just created. (You can also use the “search box” to enter your form’s title and search that way )
Once you have located your form, click on the “Edit” Icon to open the “Form Editor” dashboard to edit and customize your form.

On the “Form Editor” Dashboard you will choose the different fields and widgets that will make up your Form online. (Everyone of these options will open another popup window for its dashboard for the option you choose)
-
VIEW FORM you will be able to see what the form will look to your applicants
-
SYSTEM FIELDS you will choose what fields make up the components of your forms
-
CUSTOM FIELDS more options for fields to design your form
-
WIDGETS here you choose from adding upload/ submit buttons to triggers that make automatic responses
-
SHARES another place to give you the opportunity to share your form with your team or individuals
-
WEB PAGE where you get the link for applicants to get access to your form online.
When you are completely finished in any of these dashboards, close the window by clicking the “X” in the upper right corner. (Your choices are saved automatically when closing this window. Closing this window will take you back to the “Form Editor” dashboard to the form you are currently editing)

On the “System Fields” dashboard you will choose from premade basic information fields for your form. (name, address, grade, etc) Click on the elements that you wish to add onto the form. All elements/ fields you chose to include will turn green indicating they are selected. When you are finished, close the window by clicking the “X” in the upper right corner.

On the “Custom Fields” dashboard you will choose from premade information fields for your form. (email addresses, reference emails, signature spots, etc) Click on the elements that you wish to add onto the form. Any of the elements/ fields you chose to include on your form will turn green indicating they are selected. When you are finished, close the window by clicking the “X” in the upper right corner.
 On the “Widgets” dashboard you will choose from premade fields that will let you add upload/ submit buttons to triggers that make automatic responses on your form. (name, address, grade, etc) Click on the elements that you wish to add onto the form. All elements/ fields will turn green indicating they are selected. When you are finished, close the window by clicking the “X”. On the “Widgets” dashboard you will choose from premade fields that will let you add upload/ submit buttons to triggers that make automatic responses on your form. (name, address, grade, etc) Click on the elements that you wish to add onto the form. All elements/ fields will turn green indicating they are selected. When you are finished, close the window by clicking the “X”.

|