Oasis Student Information Systems > Help Desk > Knowledgebase

Search help:


Article 557: How Do I Add a "New User"?

Solution

zl-ikG4MTRJTaDXojobxsg7UoXDyWdBD0UDEtEJYwAaGxtMpgew8ecssmtMKRZaKQKmZgZwJtxgjCnhOw4hVtwfiD8zhzX27qpfcWKku27OBOWSH4UQOKtYxNe9c3b3w3ozctgGzLafnnAZP1_94NI4


Admission/ Recruitment Module
Knowledge Base 2.0 article 557


How Do I Add A “New User”?


Navigation Path
<various modules> → “Add New User” 


There are various ways to add a new user to the system.

1. Custom forms - such as an Inquiry or Application Form ( requires account validation )
2. Importing records - A System Administrator ( v5. Now offers user validation )
3. Module Administrator - (manually) + Add New User ( requires account validation)

See below how to add User through the Admissions Module (adding a New User manually) :

You will find the Add User tool  on the “Recruitment” dashboard. You will have the choice to “Add New Inquiry”, “Add New Applicant”, “New Staff” or “New Alumni” 

You start by clicking  on the “Recruitment” icon on your “my Management tools”dashboard (this will take you to another page) 

hzVGBOyM-q09ZTC9T_pyLzeb02GIS7MmQ1_-2t-vMVF2QUbW8bgNQYsNwJenEHutXGIt0eg7XUdQ5mjWNtJrqrADsJEgVn5AEsp88e0S96cPB1LSDuQDwmFjzV4erqs0D243JA0yyCYjtLkjGdbgRg

On the “Recruitment” dashboard you will click on the “Add New User” tab on the left side of your screen.  Which will open a new window for you to start your search. 

TGcgp2ooQmYXFMSuSg43V4UWlvHQ-yLZ581THd5udQOT-ajTGxBQ-QzIOGqynUGlAfo8D6XjvNLb0iR-RBZh3-r3kJxcZDKt8JYid1nOSYUWZsqALf4IN85iXh3dCtaOBd6eqnQriuF540djpKH5fA

The process is the same for any of the “New User’s” categories  (“Add New Inquiry” /“Add New Applicant”? “New Staff” and “New Alumni” , you will need their email address for all  options)You will want to click on the option you want to start. (“Add New Inquiry” /“Add New Applicant”? “New Staff” and “New Alumni”


Xek2eqfk5YHi3g2hoYrzn5ufUv_Ay0XDF8cZzTx49FMmJbi0_x9QCYSPFx8Gxh2D2I02Rx_v-10G6ihj8sKWSTf-OzNF9lC2SzRYX1bsoVH6cxPKNRlEG_Wbo__H02RUOTCRu_bF9QOGCStkv6l1Ew

Once you have made your choice you will be prompted to enter your applicants email address and click on the green  “Search User” box. (YOU MUST HAVE THEIR EMAIL TO ADD OR SEARCH THEM IN ANY OF THE OPTIONS!)  


4N7FkL3HrzwupYV4QLeytAmRZsWBhzrT9Z-mwqcPblbUwx3IBUdXhQM6TvFqEE5Bdhnri5oUGZQ9KprySxtjBE0ltex8aC4McJrqp1lIAOtFtKrscMXHpVuj425VFJ5aVX2FGHT4md-dgIvr2eLQbQ

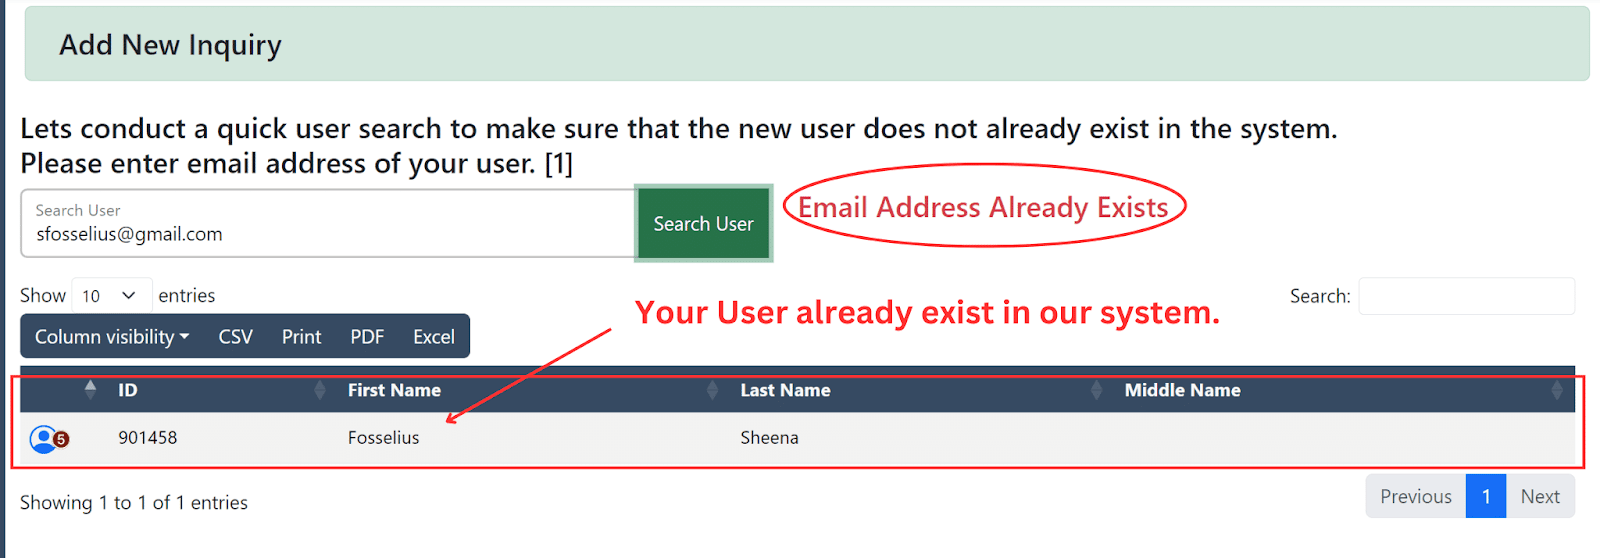
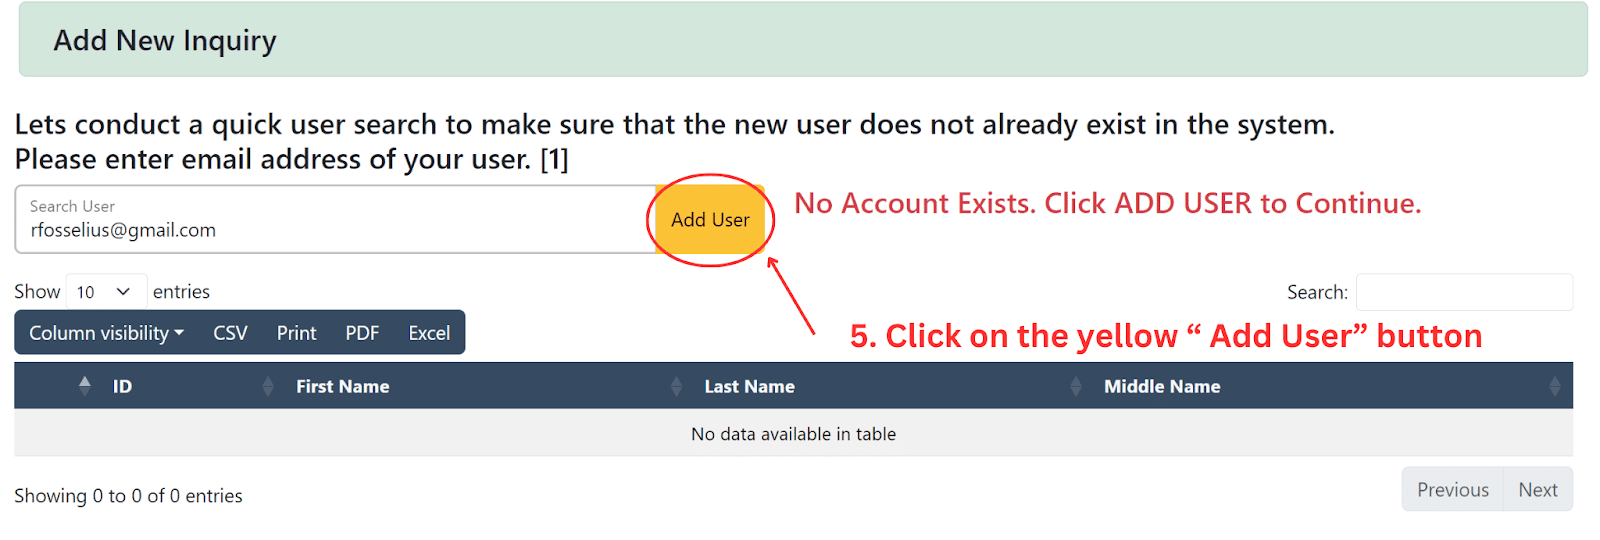
You will get one of two things after you click on the “Search User” button. If they are new and have no account you will see a ”Add User” yellow button appear on your screen. If the User already exists in the system you will see a message in red telling you they are in the system.  

Examples of either of the results you can receive after clicking on the “Search User” :


Existing User: 

If you have an email that has been previously used, you will see results under the textbox you just entered the email into. In that case you can click on the “student profile” icon on  the left side of the screen to view their account (the blue person icon)


JKQiqab__G5fvJSC02kjflB9kr_Pa30pF19zmszMD35GMu4YstwypCiZBTVlgBE1nGejkIXIrNUFGSgj9ydL-zZ6KOrmMsKbCFxwDg9IEB009F7xdcKPfMvs4KTwgEXS9FcVTtMfvISvO18p2HvFTg

New User: 

Once you see that the user does not exist already you will want to click on the yellow “Add User” button.  When you click on the button you will be able to start editing your new user's account straight from this section. 

phZ1YiuKDgSvTlWlE-629mhU1QP3j_bYkr2nzqyKnbYZjIPw9oR1gZ_JYu3Rx9d92pv9RjzbbuwGRO41LTBRKjTriiXj_ct8RP3pNTI-_ZkwrbPseyH1Y03IwAcG09FklWg1PvVbtEq0kYBucUERHQ

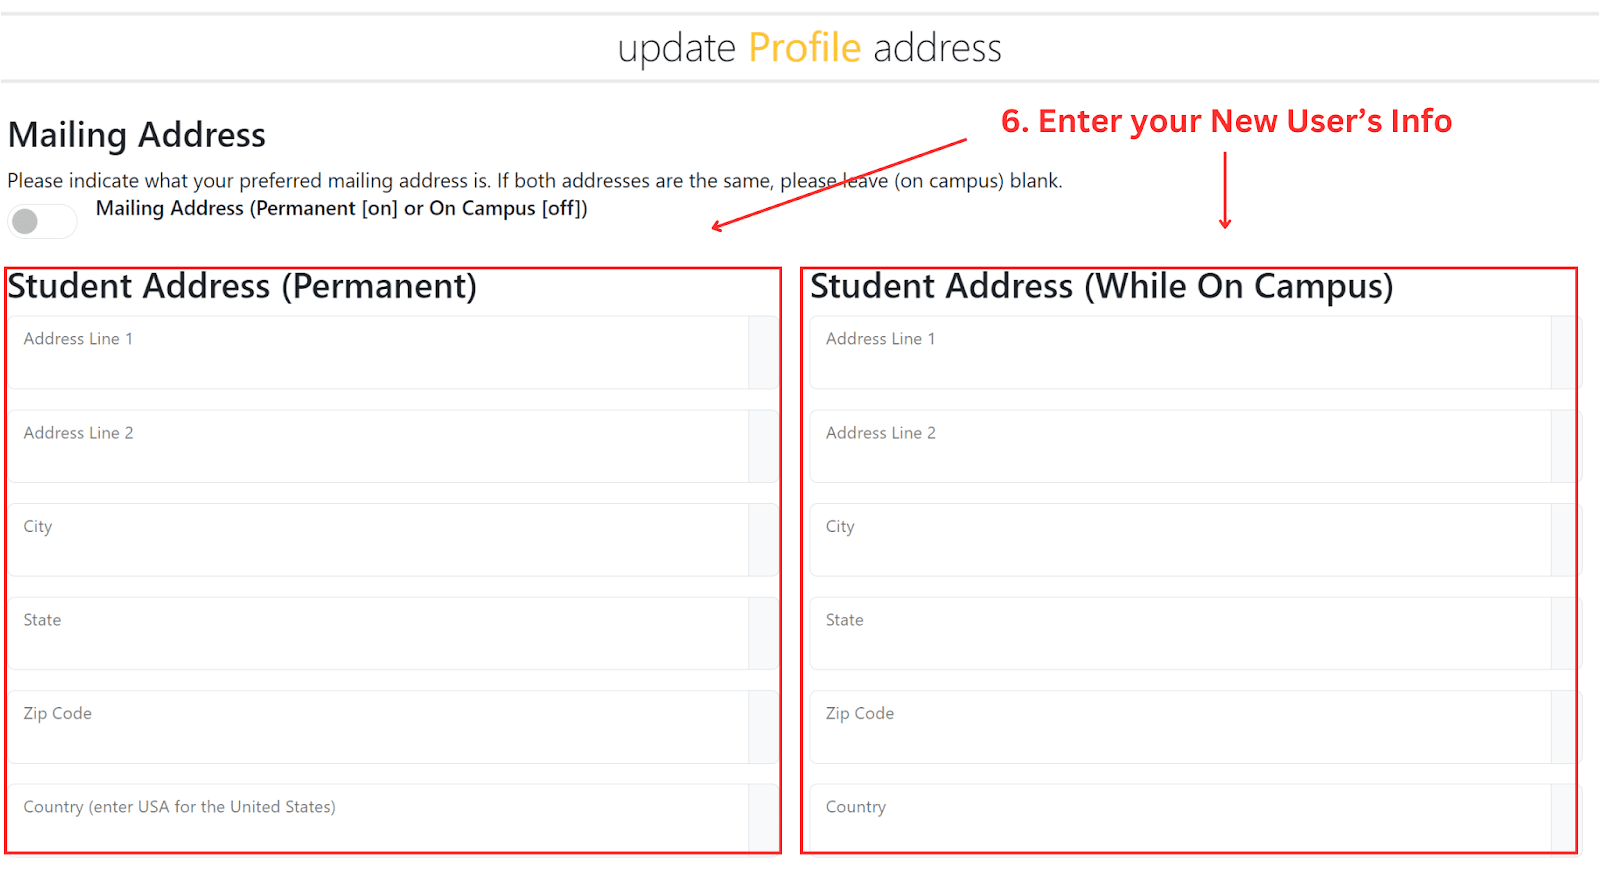
All you have left is to enter in your New User’s information and click on the “Authorize Account” button. This is basic information; name, address, phone number, etc…


fZCtj9yzFYGvBL6HGVXgxkuPUH2ZwKF5ia1qiqzx9oH78QJQUZx-GGRnWFKnq5TI-OQ__YQbe9CgOpe6lrWAiG0SOTKeq6JMGzcmUZP9Cbh7qY02iw06swL5kN6kKZB4V5ZN_8RVvUxUys5kDX4PFA

jgwTBf5fbPiCmrq5cC1yJs-3sxK1Z-SYGCOOqrOCibnvNKDnQfDv04XCtudOgdCRfpIwYs8eN3pnSWJN0iOUWCTUKKviaXNw50kmO4DNWOq4IV9PX_9bgD5YcB8GNna_dO6SGk9Xx_hnA1alwvytYQ

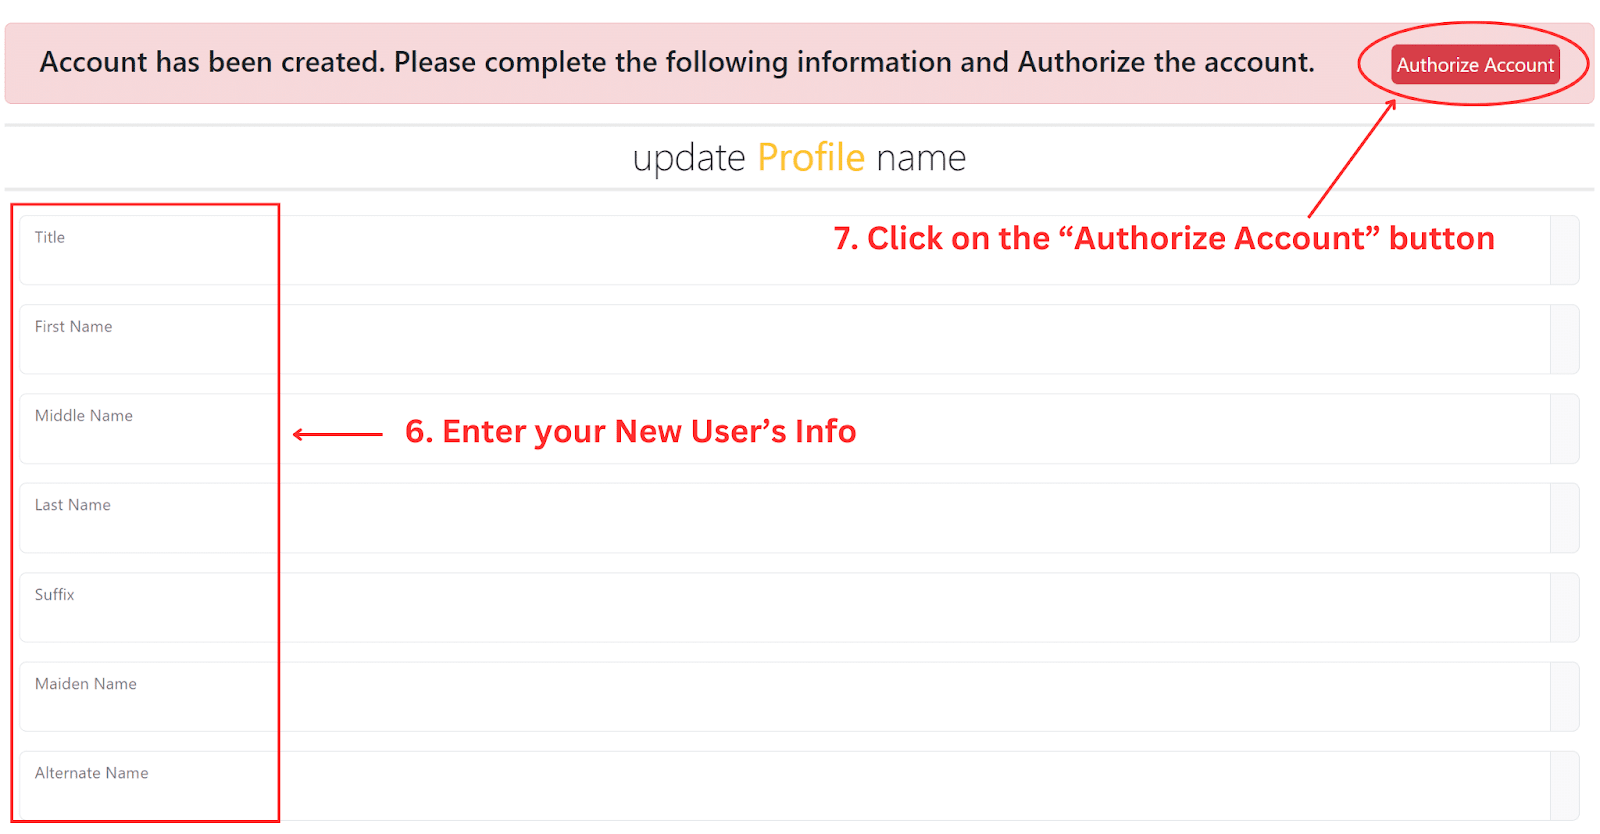
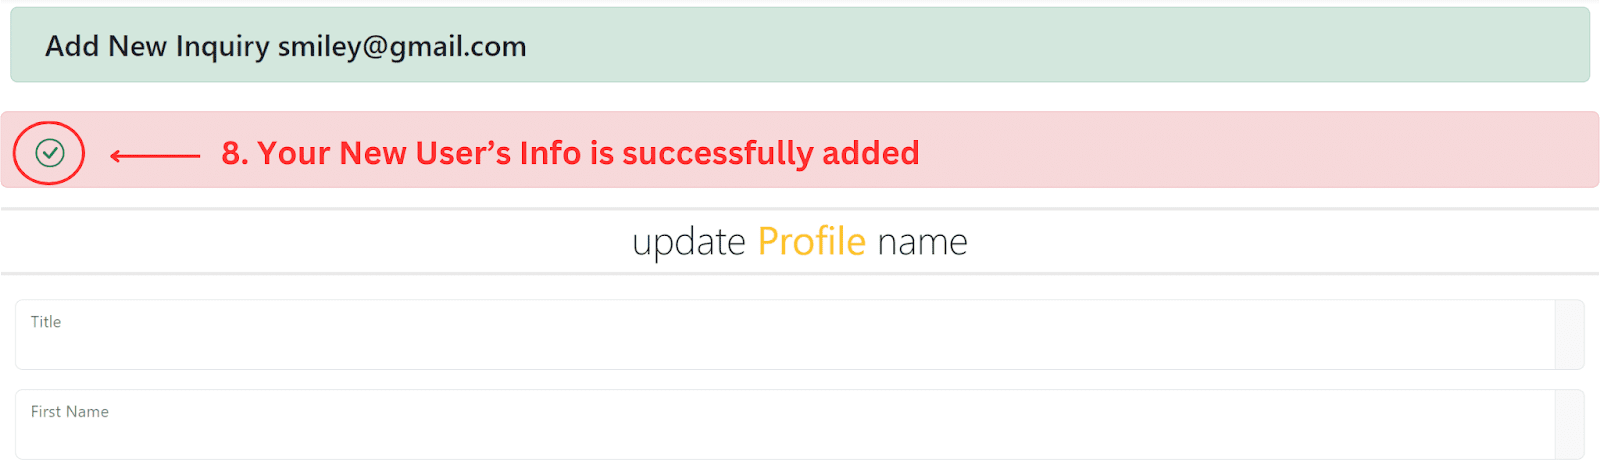
Once you click on the “Authorize Account” button you will see a green check mark in the left corner of the page. This check mark indicates that you have successfully added your New User.

3xpXvjXcMSA1SqubNUcQtYJ0o418Y66seCXKIaN28nDU7Uuu4AcVkUP7MXTvbj9y8rQCqDGJsYxVQ2TOvyu17RIP_66DzFMqllb-Hn4Ra2k4ffRPfSToYsi_hGeP4LFc3PlFA2iEZ-brsf9xTSJkeQ


Also Read: 


           How to Search For a Users Account:  (read Article 558) 


Was this article helpful? yes / no
Related articles Article 136: How Do I Create A Custom Form?
Article 569: How Do I Add "Images" To My Survey?
Article 572: How Do I Add A Survey Question ?
Help Fund Me: Student Manual
Article 157: How Do I Add Tasks To The Task Manager?
Article details
Article ID: 557
Category: Admissions Management System
Rating (Votes): Article not rated yet (0)

 
« Go back

 
Powered by Help Desk Software HESK, brought to you by SysAid